在一个新工作里,总要学习点什么,这个企业里使用的ERP系统是SAP Business one,使用的系统集成中间件平台是SAP B1iSN,在B1iSN里主要使用的ETL技术是XSL。所以这两天把XML有关的知识恶补了一下,XML、XSLT、XPath、XQuery、XSD、WSDL、SOAP等都简单地看了一下,今天在这里要讲的并不是XML,而是WCF和Web Service,但它们都是基于XML的。
OData stands for the Open Data Protocol. It was initiated by Microsoft and is now an ISO and OASIS standard. OData enables the creation and consumption of RESTful APIs, which allow resources, defined in a data model and identified by using URLs, to be published and edited by Web clients using simple HTTP requests.RESTier is a RESTful API development framework for building standardized, OData V4 based RESTful services on .NET platform. It can be seen as a middle-ware on top of Web API OData. RESTier provides facilities to bootstrap an OData service like what WCF Data Services (which is sunset) does, beside this, it supports to add business logic in several simple steps, has flexibility and easy customization like what Web API OData do. It also supports to add additional publishers to support other protocols and additional providers to support other data sources.
For more information about OData, please refer to the following resources:
After RESTier 0.4.0, creating an OData service has never been easier! This subsection shows how to create an OData V4 endpoint using RESTier in a few minutes. AdventureWorksLT will be used as the sample database and Entity Framework as the data proxy.
Create a project and a web app
1.Open Visual Studio 2015 or Visual Studio 2013. If you use Visual Studio 2013, the screens will be slightly different from the screenshots, but the procedures are essentially the same.
2.From the File menu, click New > Project.
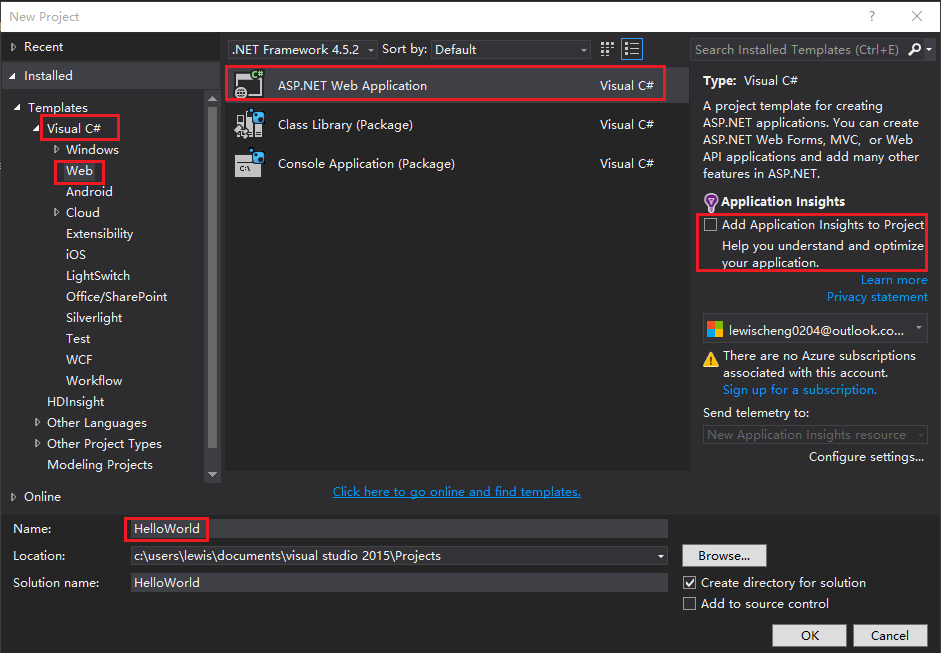
3.In the New Project dialog box, click C# > Web > ASP.NET Web Application.
4.Clear the Add Application Insights to Project check box.
5.Name the application HelloWorld.
6.Click OK.
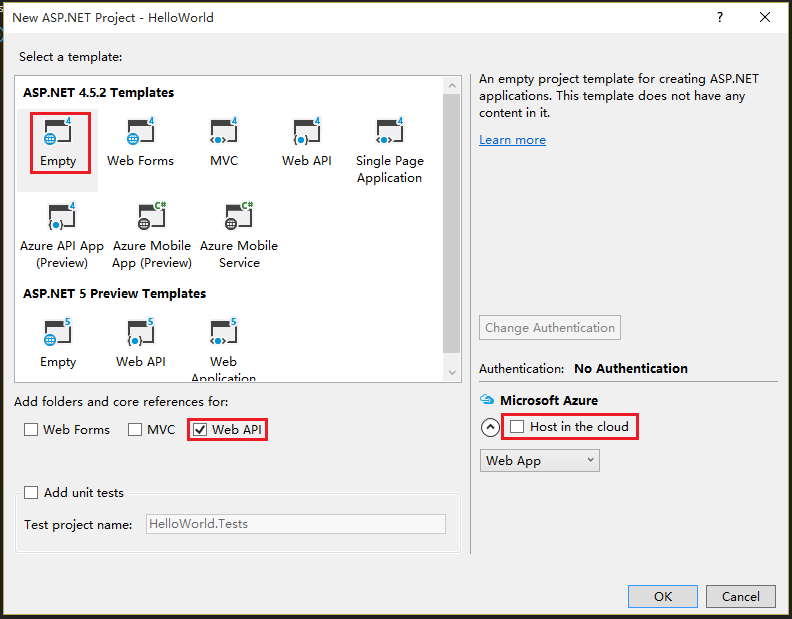
7.In the New ASP.NET Project dialog box, select the Empty template.
8.Select the Web API check box.
9.Clear the Host in the cloud check box.
Install the RESTier packages
1.In the Solution Explorer window, right click the project HelloWorld and select Manage NuGet Packages….
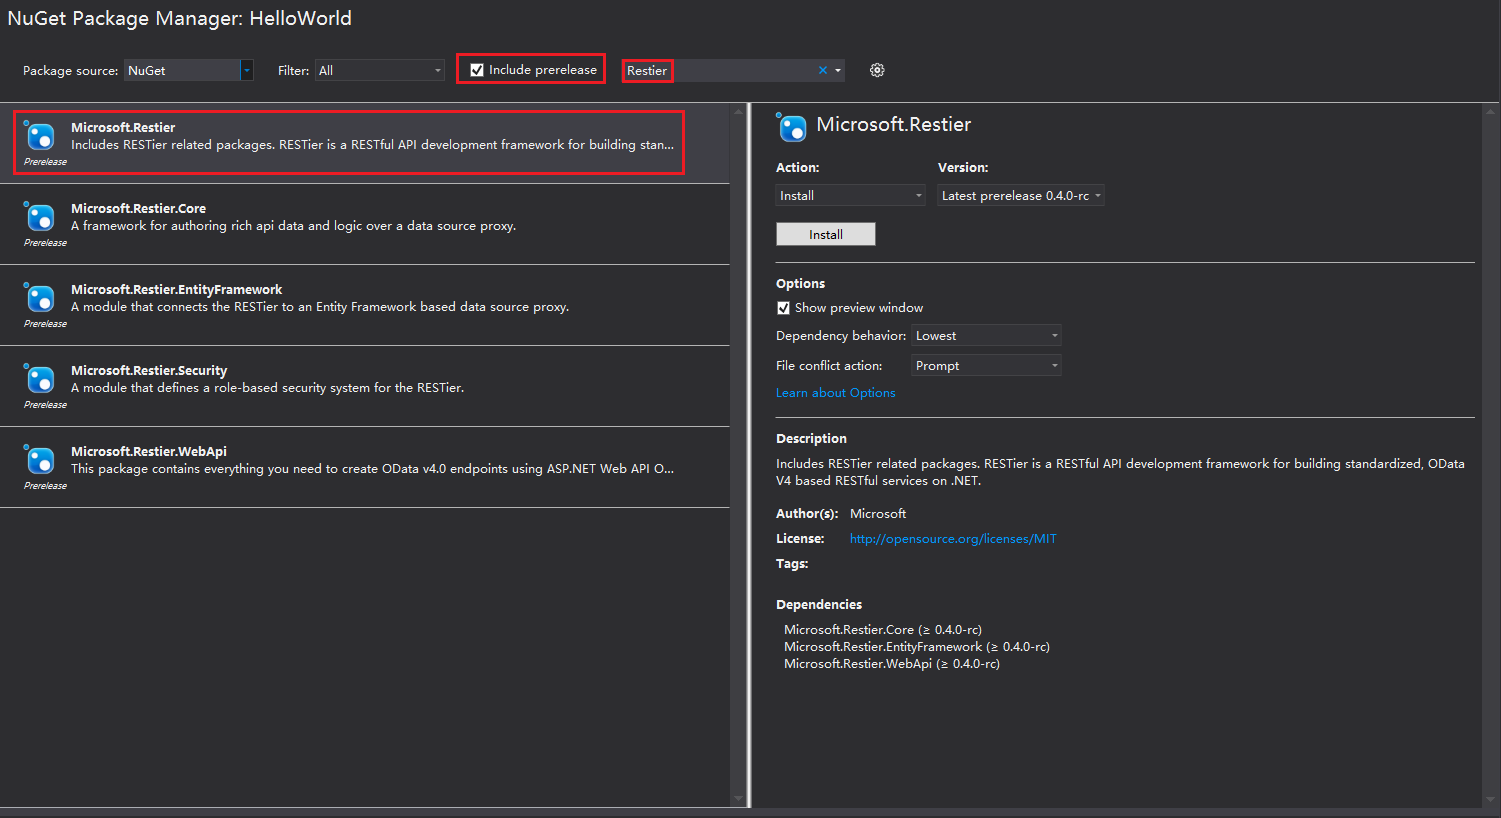
2.In the NuGet Package Manager window, select the Include prerelease checkbox.
3.Type Restier in the Search Box beside and press Enter.
4.Select Microsoft.Restier and click the Install button.
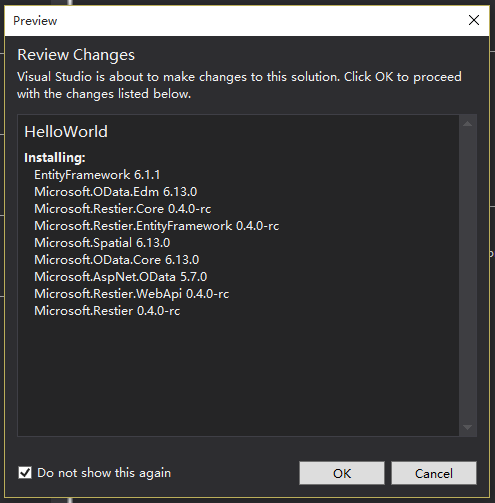
5.In the Preview dialog box, click the OK button.
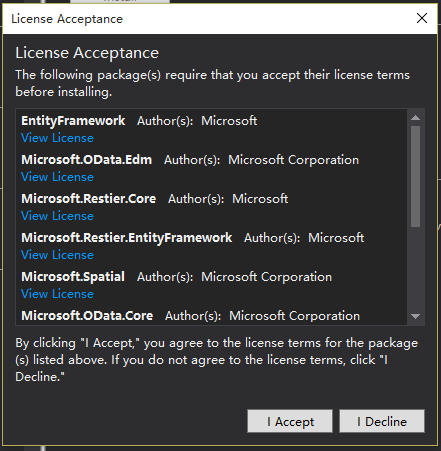
6.In the License Acceptance dialog box, click the I Accept button.
2.In the Solution Explorer window, right click the Models folder under the project HelloWorld and select Add > New Item.
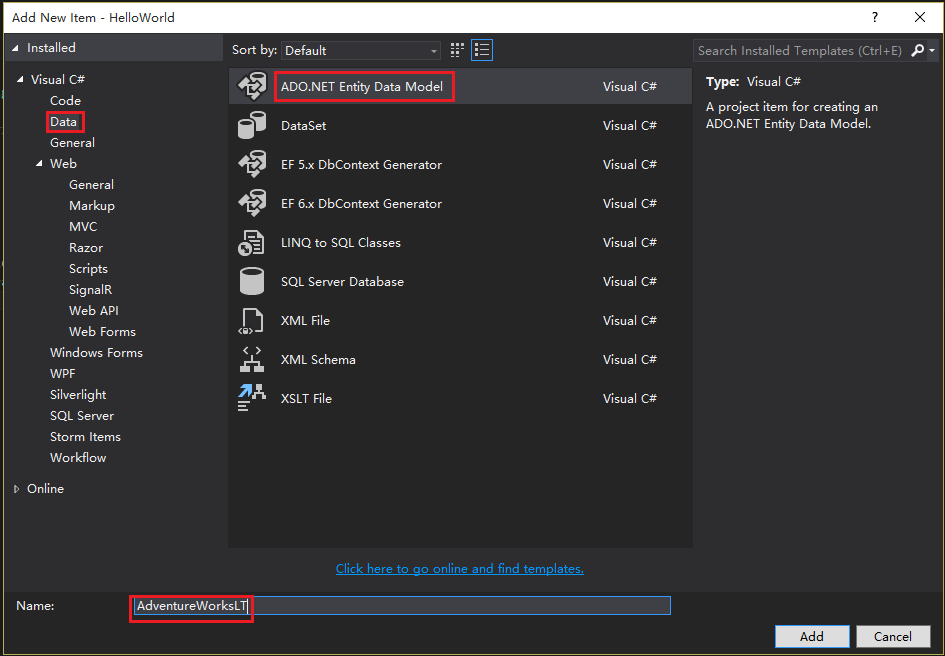
3.In the Add New Item – HelloWorld dialog box, click C# > Data > ADO.NET Entity Data Model.
4.Name the model AdventureWorksLT.
5.Click the Add button.
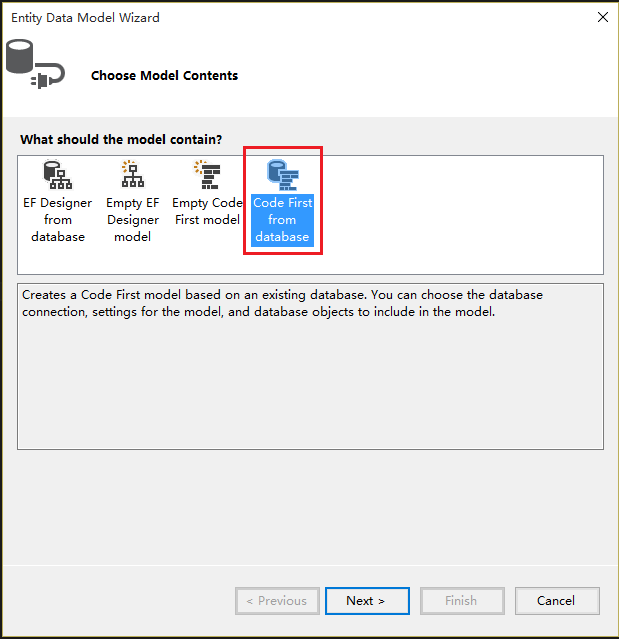
6.In the Entity Data Model Wizard window, select the item Code First from database.
7.Click the Next button.
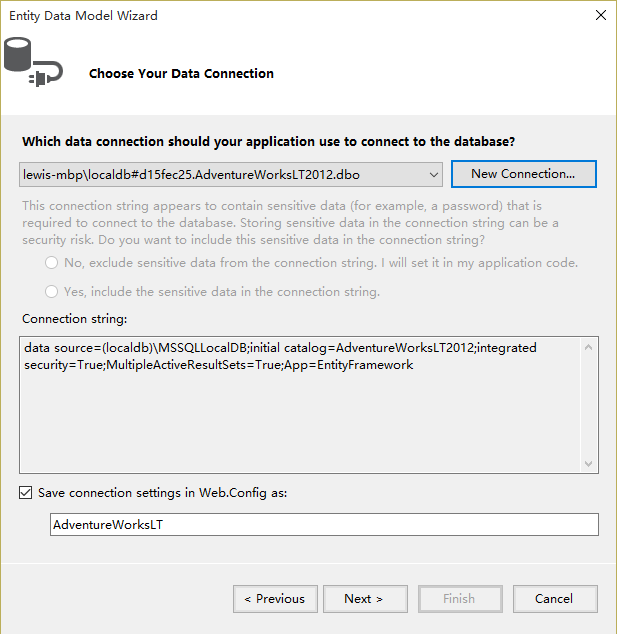
8.Click the New Connection button.
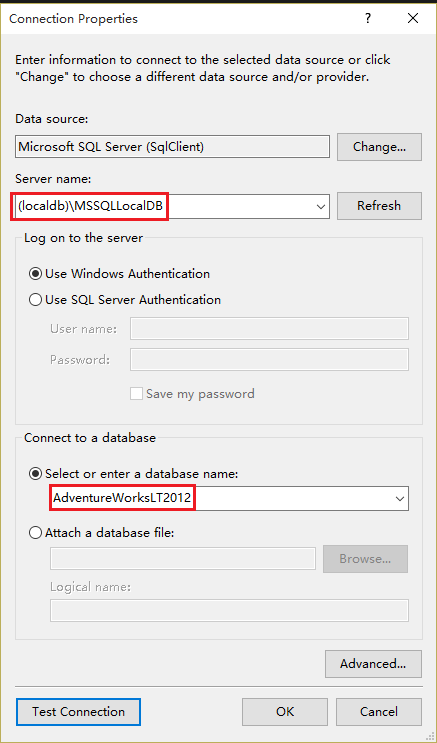
9.In the Connection Properties dialog box, type (localdb)MSSQLLocalDB for Server name.
10.Select AdventureWorksLT2012 for database name.
11.After returning to the Entity Data Model Wizard window, click the Next button.
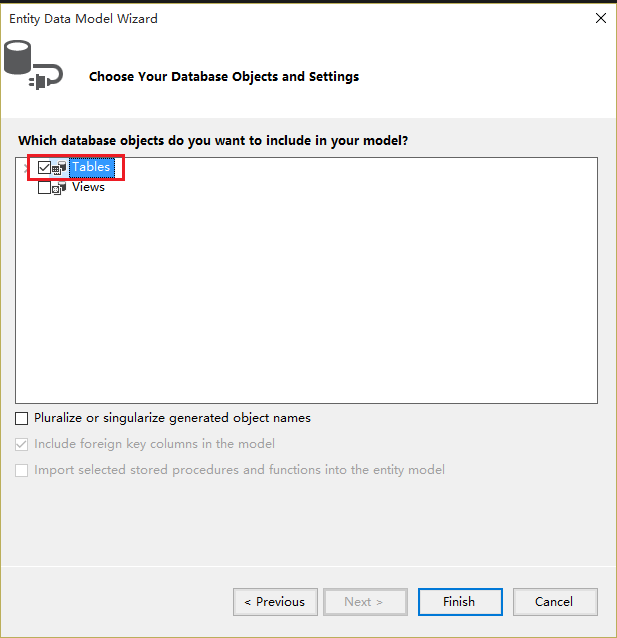
12.Select the Tables check box and click the Finish button.
Configure the OData Endpoint
In the Solution Explorer window, click HelloWorld > App_Start > WebApiConfig.cs. Replace the WebApiConfig class the following code.
namespace HelloWorld
{
    public static class WebApiConfig
    {
        public async static void Register(HttpConfiguration config)
        {
            // enable query options for all properties
            config.Filter().Expand().Select().OrderBy().MaxTop(null).Count();
            await config.MapRestierRoute<EntityFrameworkApi<AdventureWorksLT>>(
                "AdventureWorksLT",
                "api/AdventureWorksLT",
                new RestierBatchHandler(GlobalConfiguration.DefaultServer));
        }
    }
}
Note : DbApi was renamed to EntityFrameworkApi from version 0.5.
The configuration “config.Filter().Expand().Select().OrderBy().MaxTop(null).Count();” is enabling filter/expand/select/orderby/count on all properties, starting 1.0 release, there are more smaller granularity control on the properties which can be used in query option, and all properties are disabled to be used by default. User can add configured in CLR class or during model build to configure which properties are allowed to be used in filter/expand/select/orderby/count. Refer to Model bound document for more details.
After these steps, you will have finished bootstrapping an OData service endpoint. You can then Run the project and an OData service is started. Then you can start by accessing the URL http://localhost:<ISS Express port>/api/AdventureWorksLT to view all available entity sets, and try with other basic OData CRUD operations. For instance, you may try querying any of the entity sets using the $select, $filter, $orderby, $top, $skip or $apply query string parameters.